
Verwandte Artikel zu Matharts: Exploring Math Through Art for 3 to 6 Year...
Matharts: Exploring Math Through Art for 3 to 6 Year Olds (Bright Ideas for Learning) - Softcover
Buch 8 von 11: Bright Ideas for Learning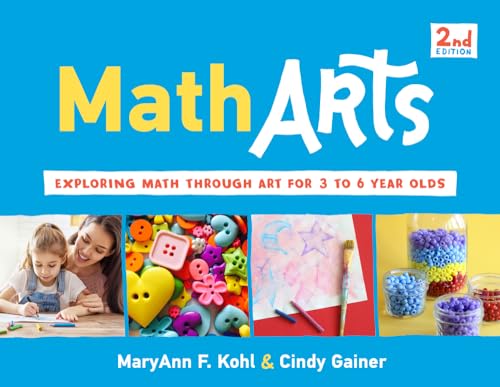
Inhaltsangabe
Get ready to create and count in this exciting introduction to math! MathArts is an innovative approach that uses creative art projects to introduce preschoolers to early math concepts. Each of the more than 100 hands-on projects is designed to help children discover essential math skills through a creative process unique to every individual. Math concepts include one-to-one correspondence, matching, sorting, grouping, classifying, opposites, number recognition, number values, and counting. This well-organized book provides both teachers and parents with a diverse range of activities for making math both fun and fascinating. The possibilities are endless!
Die Inhaltsangabe kann sich auf eine andere Ausgabe dieses Titels beziehen.
Über die Autorin bzw. den Autor
MaryAnn F. Kohl is the award-winning author of more than 20 books, including Discovering Great Artists, Science Arts, Scribble Art, Storybook Art, Mudworks, and Making Make-Believe. Her philosophy, “It’s the process, not the product,” guides her writing as she provides open-ended art activities for young children. MaryAnn’s activities focus on the experience of art, not the final product a child creates.
Cindy Gainer is an award-winning author and illustrator whose books include I’m Like You, You’re Like Me and, with Kohl, Good Earth Art.
Cindy Gainer is an award-winning author and illustrator whose books include I’m Like You, You’re Like Me and, with Kohl, Good Earth Art.
Auszug. © Genehmigter Nachdruck. Alle Rechte vorbehalten.
MathArts
Exploring Math Through Art for 3 to 6 Year Olds
By MaryAnn F. Kohl, Cindy GainerChicago Review Press Incorporated
Copyright © 2019 MaryAnn F. Kohl and Cindy Gainer
All rights reserved.
ISBN: 978-1-64160-024-8All rights reserved.
Contents
Dear Reader,
Using the Icons,
Acknowledgments,
Introduction,
General Art Materials,
Part 1: I've Just Begun ... Exploring Counting,
Chapter 1: Almost Counting, One Is One,
Chapter 2: Many Kinds of Many Kinds,
Chapter 3: One, Two, Red, Blue,
Part 2: I'm on My Way ... Exploring Spatial Relationships,
Chapter 4: Near, Far, Up, Down,
Chapter 5: Fences, Frames, Boxes,
Chapter 6: Parts and Pieces,
Part 3: Look at Me Go ... Exploring Number Value,
Chapter 7: Really Counting,
Chapter 8: How Many Is Many?,
CHAPTER 1
Almost Counting, One Is One
Math concepts explored in this chapter
One-to-one correspondence
Measuring materials
Counting
Shape recognition
Matching
One of the first concepts a child will encounter before progressing to higher levels of mathematical thinking is one-to-one correspondence, or "1-to-1." One-to-one correspondence can easily be explored through art experiences. For example, gluing one cotton ball on one red circle (and not a handful of cotton balls all over a paper with a red circle) shows the child has a concept of the correspondence between one cotton ball and one red circle. Understanding and using the idea that one object goes with another one object is understanding one-to-one correspondence, a predecessor to counting and knowing number value.
Discrete materials are countable objects such as shells, bottle caps, pinecones, blocks, or buttons. Exploration with discrete materials gives the young learner experience handling and manipulating "pieces" and "items" that could be counted or are countable. Before a child can count, experience with countable materials prepares the child's mind for the concept of counting.
Continuous materials are measurable and have mathematical attributes, such as, they can be poured, weighed, or measured. Examples of continuous materials include water, sand, or flour. Exploration with continuous materials gives the young learner experience handling and manipulating items that prepare the child's mind to accept and understand the mathematical concepts of weighing and measuring.
The concept of conservation means that an item remains the same regardless of the shape or the arrangement of that item. For example, with continuous materials, if one cup of water is poured into a large jar, the water may look like less, but it is still one cup. When that one cup of water is poured into a small jar, the water may fill the jar and look like a lot of water, but it is still one cup. Very young children who have not mastered conservation think the little jar overflowing with water has more water than the big jar. An example of conservation of discrete materials is when a handful of shells is grouped close together or far apart. There are still the same number of shells; nothing has really changed except the arrangement of the shells. Young children may think that when the shells are spread out there are more, and when the shells are close together, there are less. Understanding the concept of conservation will occur naturally from exploring and manipulating math and art materials. If children have mathart experiences like the ones in this chapter, they will understand the concept when they are developmentally ready.
Working with and recognizing shapes is another basic math area that lends itself beautifully to creative art experiences. Shapes can be used in matching, pairs, patterns, sequences, order, and nearly all areas of math for young children.
Matching designs, shapes, objects, and colors is a beginning skill that precedes sorting and classifying. Hands-on math experiences with matching prepares the child to learn higher level math skills. Part of the matching experience is finding pairs. Some of the words young learners commonly use in matching are same, match, alike, look the same, matches, matching.
Bottle Cap Treasures
As the child explores placing one item in one container, he is learning the skill of one-to-one correspondence, which means that the child will understand the concept of one.
Materials
[check] save caps and lids from any of the following containers plastic milk jugs, mayonnaise jars, juice bottles, pill bottles, peanut butter jars, soda bottles, spice jars
[check] white glue
[check] cardboard, any size, for base of collage (big cardboard for a really big collage, small piece for small collage)
[check] a special treasure to place inside each lid or cap, such as stickers, small drawings, small magazine pictures, marbles, paint chips, flowers (pressed in wax paper), beads, photos, collections of things
Note: Use caution with young children who still put small objects in their mouths.
Process
1. Glue the caps or lids to the cardboard with the inside of the cap or lid facing up like a small cup or bowl. Completely cover the cardboard with bottle caps or jar lids touching.
2. Choose treasures to glue inside the caps or lids. Glue one treasure inside each one.
3. Dry the Bottle Cap Treasure collage overnight.
Variations
* Cover the cardboard with wrapping paper before adding the lids and treasures.
* Paint the cardboard, dry completely, and then glue lids and treasures to the dry, painted cardboard.
Button Sew Collage
One button on one square is a creative exploration for learning one-to-one correspondence, a prerequisite to counting.
Materials
[check] burlap cut in 20 squares, one for each button
[check] buttons with large holes, one for each square (If large-holed buttons are not available, make colorful, heavy paper circles or shapes that resemble twoholed buttons.)
[check] yarn cut in 1 foot lengths, one for each button
[check] plastic darning needle
[check] matte board or cardboard
[check] white glue or masking tape
[check] framing matte (optional)
Process
1. Thread the plastic darning needle with a piece of yarn. (For very young artists, double the yarn and knot both loose ends together.)
2. Push the needle and yarn up through a square of burlap.
3. Then push the needle through one hole in the button. Pull through.
4. Now take the needle and yarn back through the second button hole and back through the burlap. Tie or sew the yarn to the back of the burlap.
5. Continue making as many burlap squares with one button each as desired.
6. After sewing buttons on squares, glue a button square in the corner of the matte board. Masking tape works too.
7. Next glue another button square right next to the first button square, another next to that one, and so on. Fill the matte board with squares and buttons.
8. Dry completely.
9. Frame with a framing matte, if desired, using glue or tape.
Variations
* Sew other items with holes to the burlap squares, such as pipe cleaner loops, washers and nuts, beads, small cardboard squares, telephone wire loops, homemade clay buttons.
* Find a fabric with definite squares or circles. Sew buttons, one each to the fabric pattern square or circle.
One-to-One Nail Board
Nails are hammered into a board in any design. Then, one...
„Über diesen Titel“ kann sich auf eine andere Ausgabe dieses Titels beziehen.
Suchergebnisse für Matharts: Exploring Math Through Art for 3 to 6 Year...

Beispielbild für diese ISBN
MathArts : Exploring Math Through Art for 3 to 6 Year Olds
Verlag:
Chicago Review Press, Incorporated, 2018
ISBN 10: 1641600241
ISBN 13: 9781641600248
Gebraucht
Softcover
Anbieter: Better World Books, Mishawaka, IN, USA
Verkäuferbewertung 5 von 5 Sternen

Zustand: Good. Second edition. Former library copy. Pages intact with minimal writing/highlighting. The binding may be loose and creased. Dust jackets/supplements are not included. Includes library markings. Stock photo provided. Product includes identifying sticker. Better World Books: Buy Books. Do Good. Artikel-Nr. 42352891-6
Gebraucht kaufen
EUR 10,58
Versand gratis
Versand innerhalb von USA
Versand innerhalb von USA
Anzahl: 1 verfügbar
Beispielbild für diese ISBN
MathArts : Exploring Math Through Art for 3 to 6 Year Olds
Verlag:
Chicago Review Press, Incorporated, 2018
ISBN 10: 1641600241
ISBN 13: 9781641600248
Gebraucht
Softcover
Anbieter: Better World Books, Mishawaka, IN, USA
Verkäuferbewertung 5 von 5 Sternen
Zustand: Good. Second edition. Pages intact with minimal writing/highlighting. The binding may be loose and creased. Dust jackets/supplements are not included. Stock photo provided. Product includes identifying sticker. Better World Books: Buy Books. Do Good. Artikel-Nr. 67513256-6
Gebraucht kaufen
EUR 10,58
Versand gratis
Versand innerhalb von USA
Versand innerhalb von USA
Anzahl: 1 verfügbar
Beispielbild für diese ISBN
MathArts: Exploring Math Through Art for 3 to 6 Year Olds
Anbieter: Kennys Bookstore, Olney, MD, USA
Verkäuferbewertung 5 von 5 Sternen
Zustand: New. 2018. Second edition. Paperback. . . . . . Books ship from the US and Ireland. Artikel-Nr. V9781641600248
Neu kaufen
EUR 27,11
EUR 9,39 Versand
Versand innerhalb von USA
Versand innerhalb von USA
Anzahl: Mehr als 20 verfügbar
Beispielbild für diese ISBN
Matharts: Exploring Math Through Art for 3 to 6 Year Olds
Anbieter: Revaluation Books, Exeter, Vereinigtes Königreich
Verkäuferbewertung 5 von 5 Sternen
Paperback. Zustand: Brand New. 2nd edition. 176 pages. 8.25x10.75x0.50 inches. In Stock. Artikel-Nr. 1641600241
Neu kaufen
EUR 35,78
EUR 11,96 Versand
Versand von Vereinigtes Königreich nach USA
Versand von Vereinigtes Königreich nach USA
Anzahl: 1 verfügbar
Foto des Verkäufers
MathArts
Verlag:
Chicago Review Press, 2018
ISBN 10: 1641600241
ISBN 13: 9781641600248
Neu
Kartoniert / Broschiert
Anbieter: moluna, Greven, Deutschland
Verkäuferbewertung 5 von 5 Sternen
Kartoniert / Broschiert. Zustand: New. KlappentextrnrnGet ready to create and count in this exciting introduction to math! MathArts is an innovative approach that uses creative art projects to introduce preschoolers to early math concepts. Each of the more than 100 hands-on projects . Artikel-Nr. 904719580
Neu kaufen
EUR 22,11
EUR 48,99 Versand
Versand von Deutschland nach USA
Versand von Deutschland nach USA
Anzahl: 3 verfügbar