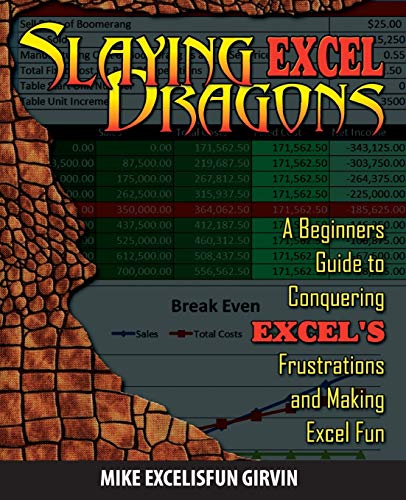
Slaying Excel Dragons: A Beginners Guide to Conquering Excel's Frustrations and Making Excel Fun - Softcover
Inhaltsangabe
This enthusiastic introduction provides support for Excel beginners and focuses on using the program immediately for maximum efficiency. With 1,104 screenshots and explicit information on everything from rows, columns, and cells to subtotaling, sorting, and pivot tables, this guide aims to alleviate the frustrations that come with using the program for the first time. This manual offers strategies for avoiding problems and streamlining efficiency and assists readers from start to finish, turning Excel 2010 novices into experts.
Die Inhaltsangabe kann sich auf eine andere Ausgabe dieses Titels beziehen.
�ber die Autorin bzw. den Autor
Mike Girvin teaches finance, accounting, and statistics using Excel at Highline Community College. He has more than 800 Excel how-to videos on YouTube and has been teaching people how to use Excel for the past 8 years. He lives in Seattle, Washington. Bill Jelen is an Excel expert at www.mrexcel.com, a regular on TechTV Canada's Call for Help, and a video podcaster who is regularly listed in the iTunes top 50. He is the author of Excel Gurus Gone Wild, Pivot Table Data Crunching, and 14 titles in the Excel for Professionals series. He lives in Akron, Ohio.
Auszug. � Genehmigter Nachdruck. Alle Rechte vorbehalten.
Slaying Excel Dragons
A Beginners Guide to Conquering Excel's Frustrations and Making Excel Fun
By Mike Girvin, Timmy JoyHoly Macro! Books
Copyright � 2011 Mike Girvin and Holy Macro! Books
All rights reserved.
ISBN: 978-1-61547-000-6All rights reserved.
Contents
Chapter 1, "How Excel is Set Up",
Chapter 2, "Keyboard Shortcuts",
Chapter 3, "Data in Excel",
Chapter 4, "Style Formatting and Page Setup",
Chapter 5, "Formulas and Functions",
Chapter 6, "Data Analysis Features",
Chapter 7, "Charts",
Chapter 8, "Conditional Formatting",
Chapter 9, "Find and Replace and Go To Features",
Appendix, "Excel Efficiency Rules",
Index,
CHAPTER 1
How Excel Is Set Up
As we get started, we must look at how Excel is set up. The essence of Excel is that it has a rectangular shape that has two directions.
The left-to-right direction is represented by letters that indicate columns. The letters are called column headers. In Figure 1, you can see the vertical column C. As we move to the left from column C, the letters go backward, and as we move to the right, the columns advance through the alphabet. (When you get to Z, the next columns are AA, AB, AC, and continue to the last column, which is XFD, which is the 16,384th column.)
The up-and-down direction is represented by numbers that indicate rows. The numbers are called row headers. In Figure 1, you can see the horizontal row 5. As we move down from row 5, the row numbers increase (the last row is 1,048,576), and as we move up, the row numbers decrease.
The intersection of a row and column is called a cell or a cell reference. In Figure 1, you can see that the cell C5 is the intersection of column C and row 5.
All the cells together are called the worksheet or spreadsheet or simply sheet. There can be many sheets in an Excel file. The name of the sheet is shown in the sheet tab. In Figure 1, the sheets tabs are a dark color, and the active sheet tab (sheet showing) is a light color. The default names for the sheets are sheet1, sheet2, and so on.
Because the default names hinder efficient and robust formula creation and navigation through a workbook, you should always give the sheet a logical name. For example, if the sheet has sales data, name it something like SalesData. This way, when you look at the sheet or make a formula with a sheet reference (more later), you have a good idea about what the sheet contains. To name the sheets, just double-click the sheet tab, type a name, and press Enter. To select a sheet, simply click the sheet tab with your cursor. All the worksheets in an Excel file are together called the workbook. You can see the workbook name in the title bar at the very top of the window (excelisfun-Start.xlsm).
Because there are more than 150 sheets in the Excel workbook file named excelisfun-Start.xlsm that came with this book, we need to be sure that you know how to navigate through this large workbook to any particular sheet that we may be working with. In Figure 2, the active sheet is named Setup, and it is colored white to indicate that the cells from this sheet can be seen and worked with. To select a sheet, simply use your cursor (white diagonal arrow) to click the sheet tab. In Figure 2, the last sheet that we can see is named Decimals. But there are many more sheets beyond (to the right). There are three ways to access sheets that cannot be seen:
• Use the keyboard shortcuts Ctrl + Page Down to move to the next sheet in a workbook (thus making it the active sheet) or Ctrl + Page Up to move to the previous sheet in a workbook (again, making it the active sheet).
• Use the sheet navigation arrows. The arrows without vertical lines move the view of the sheets without changing the active sheet, and the arrows with the vertical lines jump all the way to the end or beginning of the sheets.
• Right-click any of the sheet navigation arrows, click More Sheets, and then navigate to whichever sheet you would like.
If you are not familiar with navigating in workbooks with a large number of sheets, try all three methods before reading further in this book. Doing so will help you to follow along with the more than 150 sheets in the Excel examples in this book.
Now we can state our first two Excel Efficiency-Robust Rules:
Rule 1: Excel sheets are rectangles with columns (letters) that move left to right and rows (numbers) that move up and down. A firm understanding of this will help us later to build formulas that are efficient and robust.
Rule 2: Always name sheets (double-click the sheet tab, type the name, press Enter) with an easy-to-understand name so that navigation through the workbook and formulas with sheet references are easy to understand.
Figure 3 shows a few more Excel elements that this book assumes you are familiar with, or at least have seen before.
Note: Your ribbon might look slightly different. This is because the groups in the ribbon will expand and collapse depending on two things:
• Whether your window is maximized or restored down
• The display resolution for your computer (Control Panel settings)
Note: There is one ribbon that has many tabs. The standard seven tabs are Home, Insert, Page Layout, Formulas, Data, Review, and View. There are many context-sensitive ribbon tabs that will show up when we use certain features. For example, when we make charts or pivot tables, specific ribbon tabs will appear when we work with the charts or pivot tables. In this book, when we want to get to the Insert or Page Layout part of the ribbon, I write, "Click the Insert tab or Page Layout tab."
Note: Because the ribbons take up a lot of space, you can hide and unhide them with the keyboard shortcut Ctrl + F1.
Note: You can add buttons that you see in the ribbons to the Quick Access Toolbar (QAT) by right-clicking a button in the ribbon and pointing to Add to Quick Access Toolbar. The advantage to this is that the QAT is always visible no matter what ribbon tab you have selected.
Now it's time to take a look at keyboard shortcuts.
CHAPTER 2Keyboard Shortcuts
Now we are about to learn the best trick in all of Excel! Yes, this is the one trick that will guarantee you extra vacation time and instant success in the eyes of your bosses and co-workers. The one trick is ... well it's not just one trick, it is many. Are you ready for this?
Learn keyboard shortcuts!
Keyboard shortcuts are one of the best ways to save time and become efficient. Let's look at a few examples here, and then throughout the rest of the book, you will see many more keyboard shortcuts.
To follow along, open the file named excelisfun-Start.xlsm and navigate to the KeyB sheet.
Ctrl Key Shortcuts (and a few others)
Figure 4 shows a summary sales report for January sales summed by product and sales representative. We would like to move this summary sales report from the cell range A1:F7 to H1:M7.
Moving Data
When you move something, there are four steps:
1. Highlight the current region (cell range with data) (Ctrl + *).
2. Cut the cell range (Ctrl + X).
3. Select the upper-left corner of the destination cell range. For example, select cell H1 if you are pasting the cut cell range into the range H1:M7.
4. Paste the cut cell range (Ctrl + V).
Highlighting the Current Region
In Excel, if a cell is...
��ber diesen Titel� kann sich auf eine andere Ausgabe dieses Titels beziehen.
Suchergebnisse f�r Slaying Excel Dragons: A Beginners Guide to Conquering...

Beispielbild f�r diese ISBN
Slaying Excel Dragons: A Beginners Guide to Conquering Excel's Frustrations and Making Excel Fun
Anbieter: World of Books (was SecondSale), Montgomery, IL, USA
Verk�uferbewertung 5 von 5 Sternen
![]()
Zustand: Very Good. Item in very good condition! Textbooks may not include supplemental items i.e. CDs, access codes etc. Artikel-Nr. 00088393339
Gebraucht kaufen
EUR 4,18
Versand gratis
Versand innerhalb von USA
Versand innerhalb von USA
Anzahl: 1 verf�gbar
Beispielbild f�r diese ISBN
Slaying Excel Dragons: A Beginners Guide to Conquering Excel's Frustrations and Making Excel Fun
Anbieter: ThriftBooks-Dallas, Dallas, TX, USA
Verk�uferbewertung 5 von 5 Sternen
![]()
Paperback. Zustand: Good. No Jacket. Pages can have notes/highlighting. Spine may show signs of wear. ~ ThriftBooks: Read More, Spend Less. Artikel-Nr. G161547000XI3N00
Gebraucht kaufen
EUR 6,10
Versand gratis
Versand innerhalb von USA
Versand innerhalb von USA
Anzahl: 1 verf�gbar
Beispielbild f�r diese ISBN
Slaying Excel Dragons : A Beginners Guide to Conquering Excel's Frustrations and Making Excel Fun
Verlag:
Tickling Keys, Incorporated, 2023
ISBN 10: 161547000X
ISBN 13: 9781615470006
Gebraucht
Softcover
Anbieter: Better World Books, Mishawaka, IN, USA
Verk�uferbewertung 5 von 5 Sternen
![]()
Zustand: Good. Pages intact with minimal writing/highlighting. The binding may be loose and creased. Dust jackets/supplements are not included. Stock photo provided. Product includes identifying sticker. Better World Books: Buy Books. Do Good. Artikel-Nr. GRP91155029
Gebraucht kaufen
EUR 6,71
Versand gratis
Versand innerhalb von USA
Versand innerhalb von USA
Anzahl: 3 verf�gbar
Beispielbild f�r diese ISBN
Slaying Excel Dragons: A Beginners Guide to Conquering Excel's Frustrations and Making Excel Fun
Anbieter: World of Books (was SecondSale), Montgomery, IL, USA
Verk�uferbewertung 5 von 5 Sternen
![]()
Zustand: Very Good. Item in very good condition! Textbooks may not include supplemental items i.e. CDs, access codes etc. Artikel-Nr. 00100633746
Gebraucht kaufen
EUR 6,75
Versand gratis
Versand innerhalb von USA
Versand innerhalb von USA
Anzahl: 2 verf�gbar
Foto des Verk�ufers
Slaying Excel Dragons
Anbieter: WeBuyBooks, Rossendale, LANCS, Vereinigtes K�nigreich
Verk�uferbewertung 5 von 5 Sternen
![]()
Zustand: Very Good. Most items will be dispatched the same or the next working day. A copy that has been read, but is in excellent condition. Pages are intact and not marred by notes or highlighting. The spine remains undamaged. Artikel-Nr. rev6959286734
Gebraucht kaufen
EUR 1,58
EUR 11,39 Versand
Versand von Vereinigtes K�nigreich nach USA
Versand von Vereinigtes K�nigreich nach USA
Anzahl: 2 verf�gbar
Beispielbild f�r diese ISBN
Slaying Excel Dragons: A Beginners Guide to Conquering Excel's Frustrations and Making Excel Fun
Anbieter: AwesomeBooks, Wallingford, Vereinigtes K�nigreich
Verk�uferbewertung 5 von 5 Sternen
![]()
Paperback. Zustand: Very Good. Slaying Excel Dragons: A Beginners Guide to Conquering Excel's Frustrations and Making Excel Fun This book is in very good condition and will be shipped within 24 hours of ordering. The cover may have some limited signs of wear but the pages are clean, intact and the spine remains undamaged. This book has clearly been well maintained and looked after thus far. Money back guarantee if you are not satisfied. See all our books here, order more than 1 book and get discounted shipping. Artikel-Nr. 7719-9781615470006
Gebraucht kaufen
EUR 13,29
EUR 4,75 Versand
Versand von Vereinigtes K�nigreich nach USA
Versand von Vereinigtes K�nigreich nach USA
Anzahl: 2 verf�gbar
Beispielbild f�r diese ISBN
Slaying Excel Dragons
Anbieter: WorldofBooks, Goring-By-Sea, WS, Vereinigtes K�nigreich
Verk�uferbewertung 5 von 5 Sternen
![]()
Paperback. Zustand: Very Good. The book has been read, but is in excellent condition. Pages are intact and not marred by notes or highlighting. The spine remains undamaged. Artikel-Nr. GOR003753681
Gebraucht kaufen
EUR 11,66
EUR 6,46 Versand
Versand von Vereinigtes K�nigreich nach USA
Versand von Vereinigtes K�nigreich nach USA
Anzahl: 4 verf�gbar
Beispielbild f�r diese ISBN
Slaying Excel Dragons: A Beginners Guide to Conquering Excel's Frustrations and Making Excel Fun
Anbieter: medimops, Berlin, Deutschland
Verk�uferbewertung 5 von 5 Sternen
![]()
Zustand: good. Befriedigend/Good: Durchschnittlich erhaltenes Buch bzw. Schutzumschlag mit Gebrauchsspuren, aber vollst�ndigen Seiten. / Describes the average WORN book or dust jacket that has all the pages present. Artikel-Nr. M0161547000X-G
Gebraucht kaufen
EUR 9,73
EUR 10,00 Versand
Versand von Deutschland nach USA
Versand von Deutschland nach USA
Anzahl: 1 verf�gbar
Beispielbild f�r diese ISBN
Slaying Excel Dragons: A Beginners Guide to Conquering Excel's Frustrations and Making Excel Fun
Anbieter: Bahamut Media, Reading, Vereinigtes K�nigreich
Verk�uferbewertung 5 von 5 Sternen
![]()
Paperback. Zustand: Very Good. This book is in very good condition and will be shipped within 24 hours of ordering. The cover may have some limited signs of wear but the pages are clean, intact and the spine remains undamaged. This book has clearly been well maintained and looked after thus far. Money back guarantee if you are not satisfied. See all our books here, order more than 1 book and get discounted shipping. Artikel-Nr. 6545-9781615470006
Gebraucht kaufen
EUR 13,29
EUR 8,05 Versand
Versand von Vereinigtes K�nigreich nach USA
Versand von Vereinigtes K�nigreich nach USA
Anzahl: 2 verf�gbar
Beispielbild f�r diese ISBN
Slaying Excel Dragons
Anbieter: Majestic Books, Hounslow, Vereinigtes K�nigreich
Verk�uferbewertung 4 von 5 Sternen
![]()
Zustand: New. pp. 532. Artikel-Nr. 6584937
Neu kaufen
EUR 29,86
EUR 7,49 Versand
Versand von Vereinigtes K�nigreich nach USA
Versand von Vereinigtes K�nigreich nach USA
Anzahl: 2 verf�gbar